
As the release dates for games like Red Alert 3, Starcraft 2 and Diablo 3 are nearing, I saw the urgent need to increase my boot camp partition which holds my Vista 64-bit installation.
Normally, people would need to destroy their current Windows partition and then make a fresh new installation after using Boot Camp assistant to make a new bigger partition.
However, being lazy as usual (one of my lecturers used to say “lazy is good engineering!”), I did a lil research into resizing my boot camp partition easily without much hassle.
The easiest way is to spend 25 pounds and get iPartition and let the app do the resizing for you. But, what about a more affordable way of doing it?
Enter the Winclone method. Winclone is basically just an app that makes an image of your current boot camp partition and saves it as a file that can be restored later on to a different partition. Below are the few steps you need to resize your boot camp partition using this way:
1) Download Winclone (free, donation can be made for appreciation)
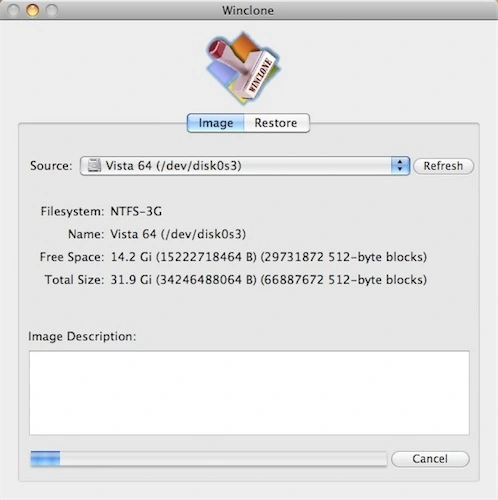
2) Use Winclone to make an image of your boot camp, save it somewhere (i.e. Desktop or an external drive if space is an issue)
3) Launch Boot Camp assistant and restore your hard disk to its original state that has no boot camp partitions
4) Launch Boot Camp assistant again but now let it help you make a new larger (or smaller) boot camp partition
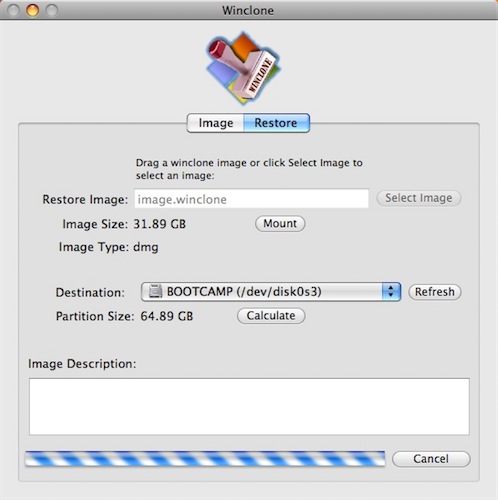
5) Now, use Winclone to restore the image you’ve made to the new boot camp partition
6) Done! Restart into Windows and check if all is well
That’s it, you’ve successfully resized your boot camp partition without having to destroy your Windows installation. Till the next tech tip! ;)
Feel free to post any questions or comments.

Nice. Thanks for the tip!
i restored and re-partitioned to a bigger drive of 56GB. after restoring using winclone, my windows C: drive is still at 5GB.
fauzan: in Winclone, try Tools => Expand Windows (NTFS) Filesystem and see if it helps.
Ting was here
Apple Store Sydney
Thank you so much for this info! I was at a loss of what to do since I no longer have my Vista CD.
no problem
Will this back up all my files as well?
Great post, saved me a lot of hassle. thanks
Will this work to shrink the partition? I have a 400 gig bootcamp partition with only about 50 gigs in use by my windows 7 install. I’d like to shrink it down to about 150 megs to make more space in osx. Will the winclone file be 50gigs or 400? Thanks, nod.
nod: I think the Winclone file will be 400gigs, but it can be restored to a 150gigs bootcamp partition as long as the Used space is less than that.
Thanks! I’ll give it a try.
jow, by the step
Launch Boot Camp assistant again but now let it help you make a new larger (or smaller) boot camp partition
can you show me how, when i click create or restore in boot camp assistant i can only restore …
All Lies.. Does not work. Erased my OS, now i cant even use my Windows 7 upgrade for the vista that was on there… Thanks..
It works for most stuff, you are just unskilled or unlucky, or both.
Well I’m both unskilled and unlucky, and this worked just great for me. Thanks.
i used this to make my partition bigger, thanks a lot!!
Hi, I just want to confirm something as I have lost my windows 7 cd. Will restoring the image to the new partition of bootcamp allow me to use my windows 7 from before but on the bigger partition?
this does’nt work, my partition is 12gb, my drive for restoring is 30GB, after restoring, I only get 12GB, so 18 GB were last
Hey there!
I am wondering if you may be interested in doing a link exchange?
I notice your blog: https://tzechuen.wordpress.com/2008/10/29/resize-your-boot-camp-partition-in-a-few-steps/ and my
website are primarily based around the same topic.
I’d really like to swap links or perhaps guest author a write-up for you. Appreciate it.